One of the most frequent questions the weekend golfer has is, “how should I start my downswing?” The answer to the masses is a very clear: it depends. In this article we will discuss ways to make a downswing that will eliminate slicing and help a golfer learn how to hit a push draw with every shot.
 Let’s take a look at how a golfer who plays a push draw begins the dowswing, much like PGA Tour winner Bill Haas.
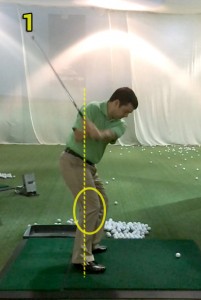
At his top position, our golfer (and Haas) has extended his back knee, allowing his hips to turn and creates a position where his left arm moves across his chest. As he starts the downswing he returns the flex in his right knee and maintains a left arm position that is inside of his stance line (see picture 1 at right). This will ensure he swings slightly right of his foot line at impact. Most slicers turn too fast in either the shoulders and/or the hips and pull the left arm outside of the stance line, creating a club head PATH that is left of their foot line or outside to in. Most golfers cannot measure how far in their arm truly is (at picture 1) which is why GolfTEC created the GolfTEC-To-Go App. Have a friend film your swing at the same angle our golfer at right is pictured and see how it compares.
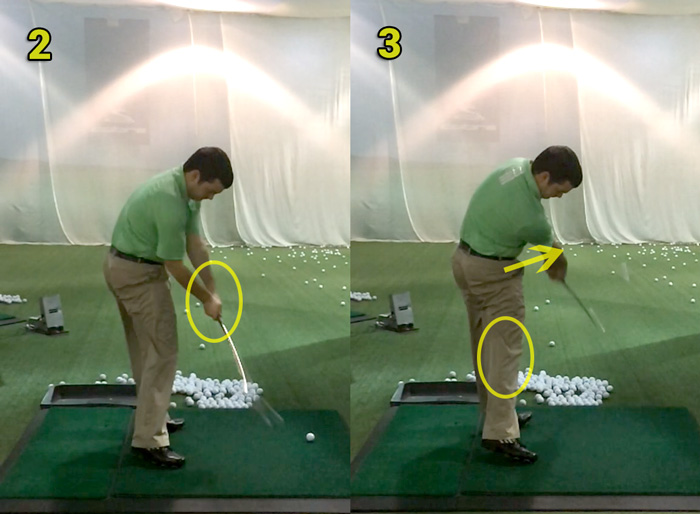
Like our golfer in Position 2 below, Bill Haas then begins to uncock his wrists while beginning to raise the handle of the club.This movement is again opposite of what a slicer will do. Moving the left wrist in this fashion will keep the club face closed to his intended path, building in the draw. Lastly, as he hits the ball Bill Haas (and our golfer) is extending his right knee again, allowing him to turn and turn fast (position 3 below). The extending action carries up into the hips and torso as well which aids the process of raising the handle of the club UP through the ball.

Raising the handle of the club and uncocking the wrists is a crucial step to successful draw the ball. Failing to do most of these movements usually ends in the golfer pulling and slicing.
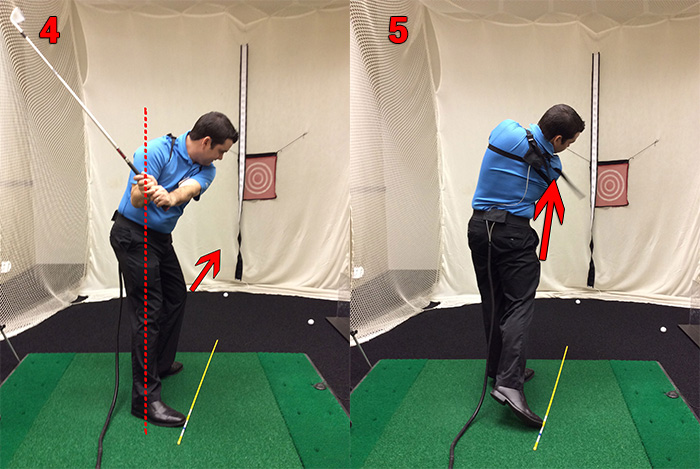
One of the best drills to sequence your downswing like Bill Haas begins with sliding your hips in the downswing to the left. You’ll see in image 5 below a yellow alignment rod and red arrow indicating the direction your hips should move. An important check point it to make sure your left arm is still inside of your stance line as seen in Bill Haas’s swing and indicated by the red line in image 4.

From here your goal is to extend your hips as if you were jumping off the ground, shown in image 5. Your thoughts should be UP not TURN. I usually recommend doing a drill like this for 15-20 minutes a few times a week until you feel comfortable enough with the sequence to go faster.
Be sure to talk to your Certified Personal Coach to determine if this drill is right for your game. Don’t forget to subscribe to the GolfTEC Blog for additional golf drills like this!


